Sunday 22 September 2013

Top 20 Hidden iOS 7 Features That You Likely Don’t Know About

Posted by Yo  
Tagged as:
00:18

With hundreds of new features to boot, iOS 7 for iPhone, iPad and iPod touch is a gold mine waiting to be explored to its full potential. Today, we’re going to go through some of the most lesser known features and tips which we believe you should try right now.
All set? Let’s begin.
1. Use Safari To See Tweets With Links / URLs
iOS Screenshot 20130921-043944 01
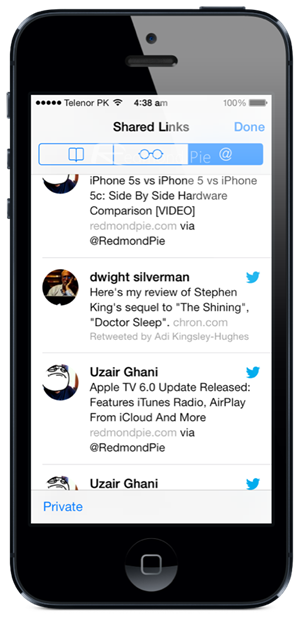
Want to quickly see all the tweets in your timeline with URLs / links in them? Simply launch Safari, press the bookmarks button – the one that looks like an open book, obviously – then press the @ button on top. Boom! All the tweets with links in one place. You should be signed in to your Twitter account in Settings > Twitter in order for this feature to work.
2. Turn Parallax On / Off
iOS Screenshot 20130920-015331 02
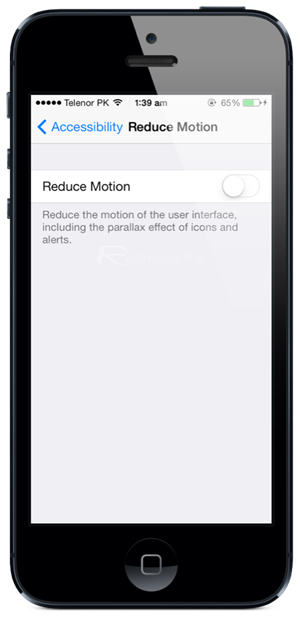
Don’t like the new iOS 7 Parallax effect on wallpapers – or 3D wallpapers as we would like to call them? Fear that it might be draining your battery? Simply turn it off. Go to Settings > General > Accessibility > Reduce Motion and turn it on or off according to your liking.
3. Enable Motion Sensing Controls
iOS Screenshot 20130920-015339 03
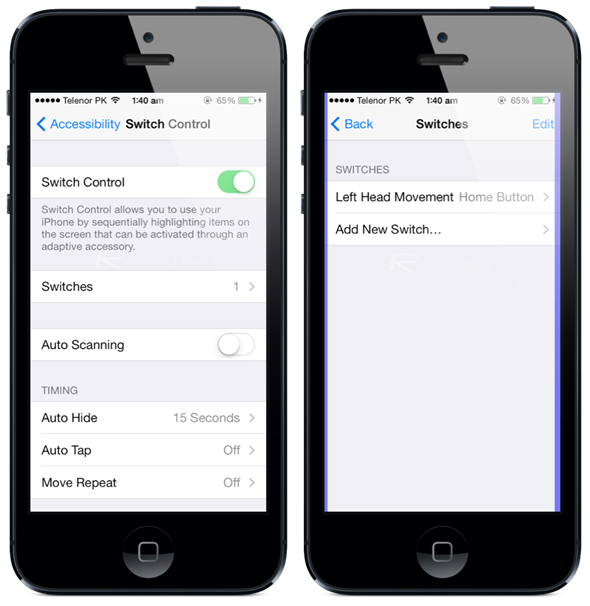
iOS 7 lets you launch Siri or press the Home button by simply tilting your head, or pull down Notification Center by tilting your head to the left. Sounds epic? Indeed it does. Head over toSettings > General > Accessibility > Switch Control to turn it on. Now go to Switches and set up switches to perform different actions.
4. Enable / Disable Bold Text or Change Font Size System-wide
iOS Screenshot 20130920-015355 05
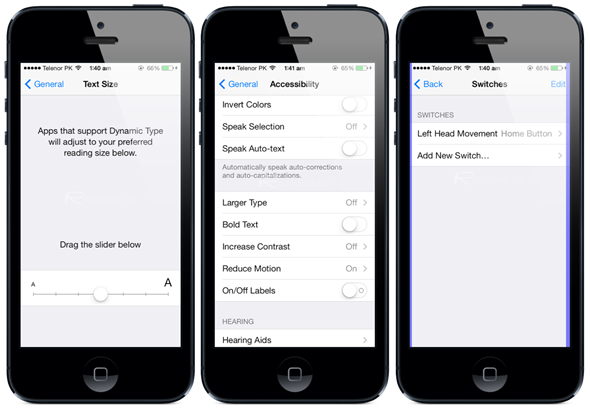
Don’t like iOS 7’s new thin font size? Bold it up! Head over to Settings > General > Accessibility > and enable Bold Text. Changing the system wide font size is as easy as pie, too. Head over to Settings > General > Text Size and adjust the font size to your liking.
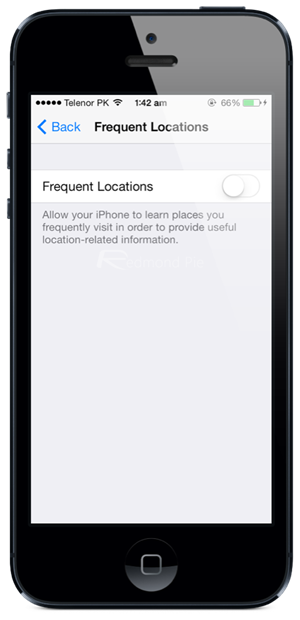
5. See Your Frequently Visited Places On A Map
iOS Screenshot 20130920-015438 09
This feature lets you see on a map which places you have been visiting. Might be concerning for some, but here’s how you can find out: go to Settings > Privacy > Location Services > System Services > Frequent Locations. I would suggest keeping this one off for obvious reasons.
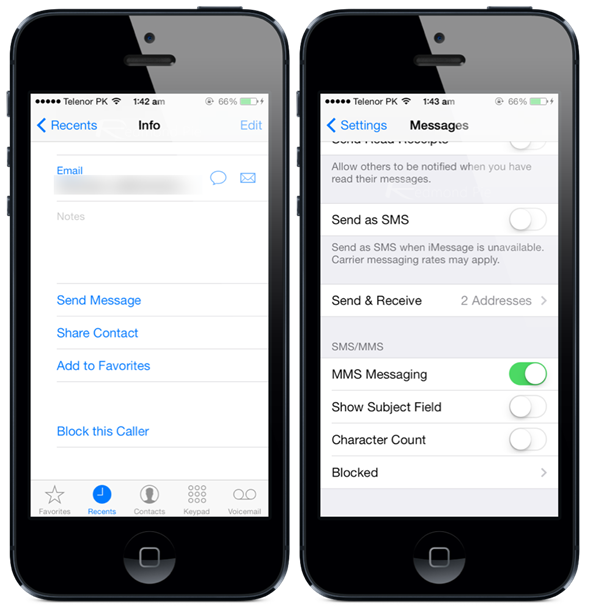
6. Block Callers and Unwanted Messages
iOS Screenshot 20130920-015521 13
This feature is a gem to use. Open the contact which might be bugging you, scroll all the way down in contact details and tap Block this Caller. That’s it. The contact will never be able to bug you again. If you want to manage blocked messages, then head over to Settings > Messages > Blocked. This also applies to FaceTime and iMessages.
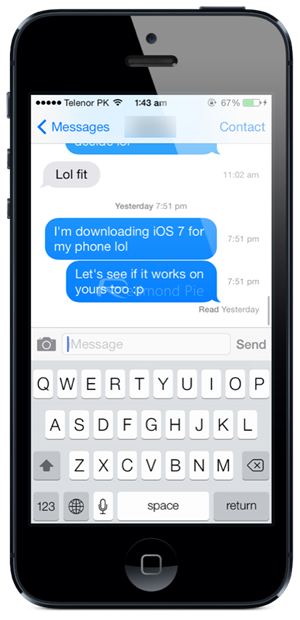
7. Show Timestamps In Messages App
iOS Screenshot 20130920-015501 11
Open a conversation thread, and swipe from right to left while holding your finger down on the screen. You will see the timestamps of all your sent and received messages.
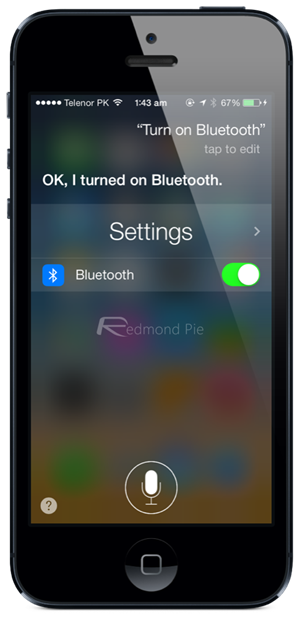
8. Use Siri To Enable / Disable System Toggles
iOS Screenshot 20130920-015445 10
Siri shed its beta tag along with the release of iOS 7, and can do a lot more than just telling you the weather, calling a certain contact, settings reminders etc. Press and hold the Home button to launch Siri and say – for example – ‘Turn Wi-Fi on’ and Siri will turn on Wi-Fi for you. Same works for Bluetooth and other system toggles.
9. Use Swipe Gesture To Go Back One Screen
iOS Screenshot 20130921-044643 04
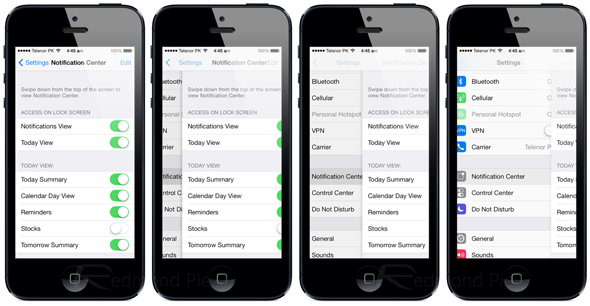
In iOS 7, you can simply use swipe gestures to go back a screen, rather than pressing that pesky back button on the display. In Messages for instance, if you’re in a thread, simply swipe from the left corner towards the right and you’ll be taken to the main Messages window. This works pretty much throughout iOS 7, like Mail, Settings, Contacts etc.
10. Take Square Photos Using Camera App
iOS Screenshot 20130920-015559 16
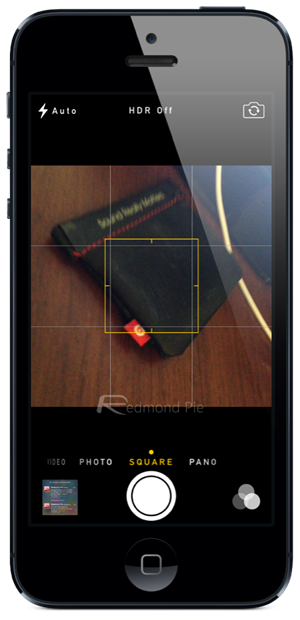
Regular photos aren’t cutting the mustard for you? The native Camera app in iOS 7 now lets you take square photos. Launch the Camera app, and swipe to the right to take photos in square proportions. You can use the same swiping gesture to go through Panorama and Videomodes.
11. Update App Content In The Background
iOS Screenshot 20130920-015621 17
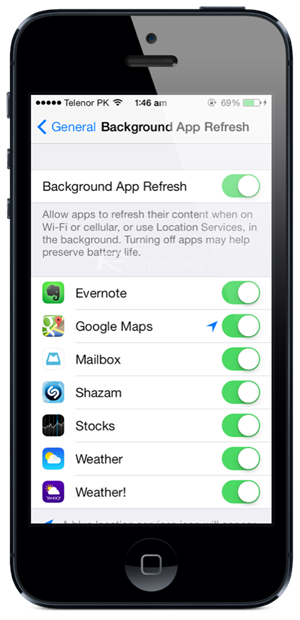
Use an app frequently but don’t like to refresh every time you launch it? iOS 7 has you covered. Go to Settings > General > Background App Refresh and enable all the apps you wish to update themselves in the background. Note: this feature really takes a toll on battery, therefore select the apps which are most relevant for you to be updated.
12. Use Panorama Photos As Lock Screen Wallpaper For Added Effect
iOS Screenshot 20130920-015710 22
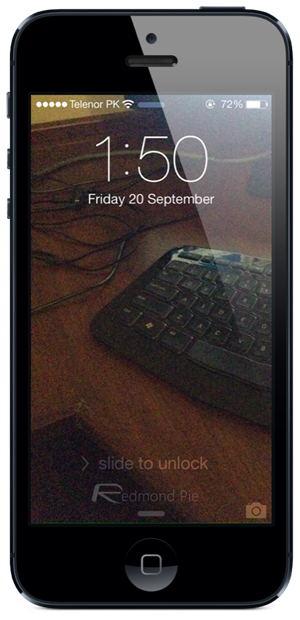
Use a panorama photo as your lock screen wallpaper which you’ve taken with your device’s camera for a cool spinning effect. Enable Parallax mode for this one which we’ve outlined in feature # 2.
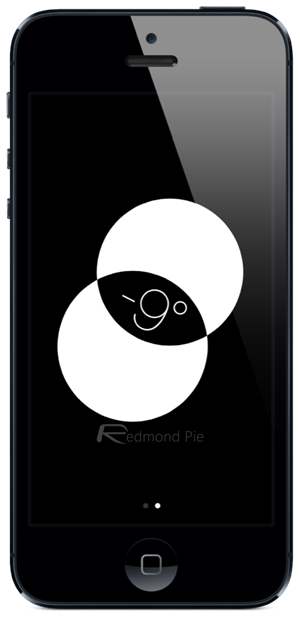
13. Bubble Level In Compass App
iOS Screenshot 20130920-015632 18
The native Compass app in iOS 7 is more than a direction telling companion. Swipe to the right after calibrating the compass to reveal a new screen that lets you access and use a bubble level.
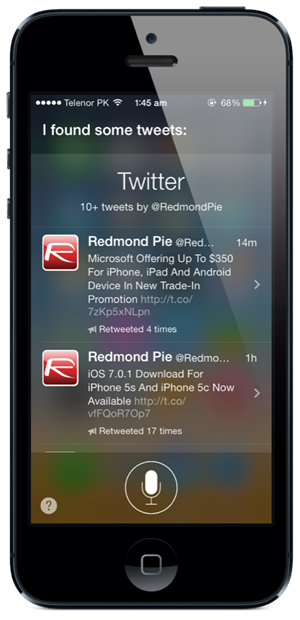
14. Use Siri For Updates From Redmond Pie
iOS Screenshot 20130920-015542 15
Yes, you read that right. Siri can show you the latest updates from our Redmond Pie feed on Twitter. Launch Siri by holding down the Home button and say ‘What is Redmond Pie saying’. And voila, all our latest updates in one place. Neat right? Give this one a shot, it’s our personal favorite.
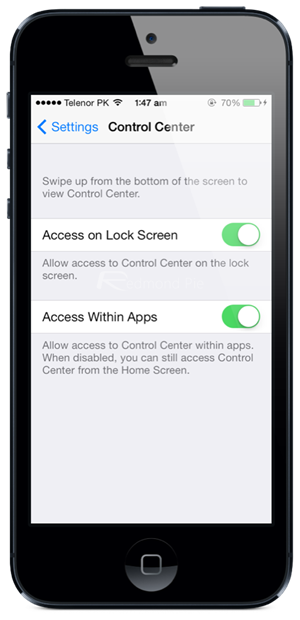
15. Enable / Disable Control Center In Lock Screen Or Apps
iOS Screenshot 20130920-015638 19
Don’t want anyone else, or yourself mistakenly launching Control Center on the lock screen or running apps? Why not disable it? Go to Settings > Control Center and enable or disable access to Control Center on the lock screen or apps.
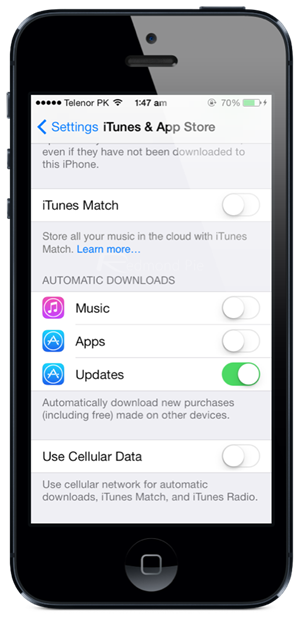
16. Turn Automatic App Updates On / Off
iOS Screenshot 20130920-015646 20
iOS 7 updates your apps in the background, saving you time and the cumbersome process of launching the App Store and performing manual updates. You can turn automatic app updates on / off by heading over to Settings > iTunes & App Store and turn on / off Updates in theAutomatic Downloads section.
17. Unlimited Apps In Folders
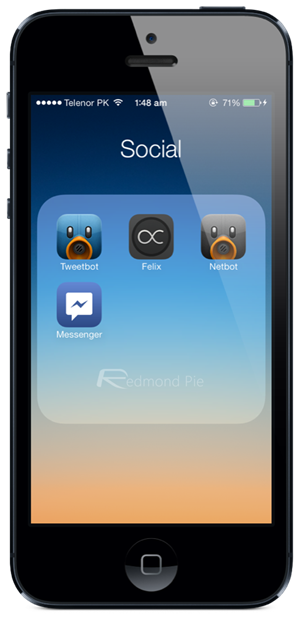
iOS Screenshot 20130920-015656 21
Folders in iOS 7 are like a black hole. You keep on throwing apps inside them and there’s no limit on how many apps you can have inside one.
18. Enable / Disable Advertising Tracking
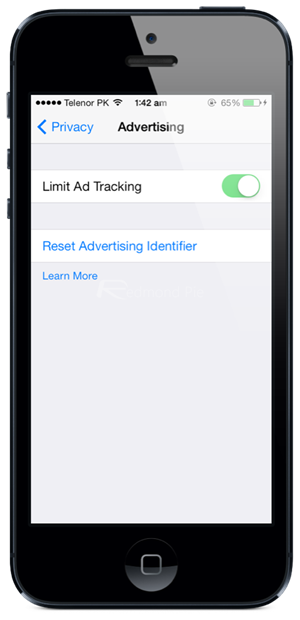
iOS Screenshot 20130920-015431 08
Don’t want your iOS device to be tracked for specific ads? Head over to Settings > Privacy > Advertising and disable Limit Ad Tracking. We’ve heard reports occasionally that this feature also saves battery life by a fraction.
19. View All Received Media In Messages App In One Place
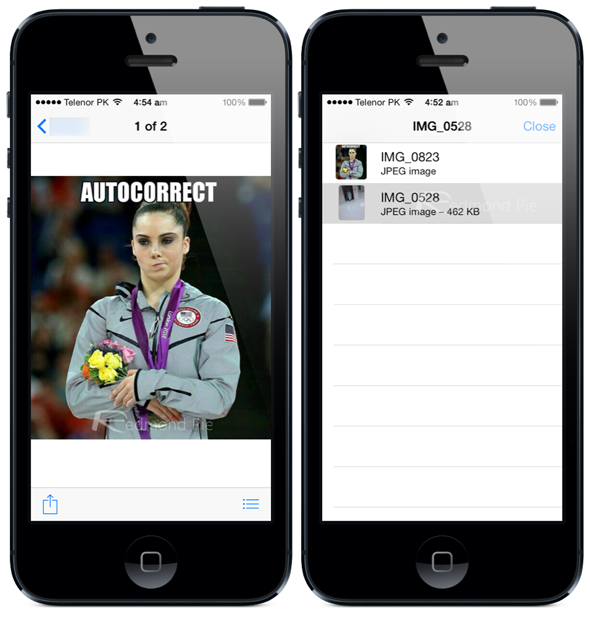
iOS Screenshot 20130921-045438 01
Received a bunch of photos or videos from someone in Messages app but lost it in a mile long thread? iOS 7 now lets you view your media all in one place. Simply tap open the last received photo / video, and press the list view (the one with three dashes, as shown in the screenshot) button.
20. Dynamic Wallpapers
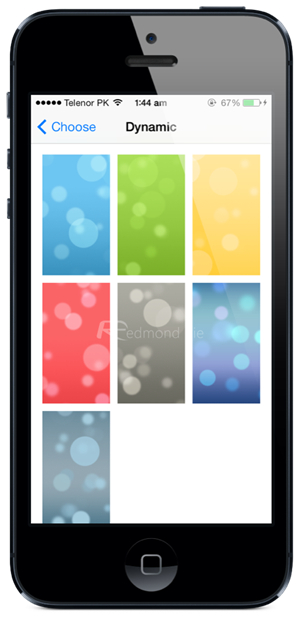
iOS Screenshot 20130920-015529 14
iOS 7 supports dynamic wallpapers, in short: animated wallpapers. Go to Settings > Wallpapers & Brightness > Choose Wallpaper > Dynamic, and there you’ll see a bunch of animated wallpapers which respond to your device’s movement.

0 comments:

Sunday 1 September 2013

Nintendo 2DS launching October 12

Posted by Yo  
Tagged as:
21:49

Nintendo today announced an all-new piece of hardware: the Nintendo 2DS. The entry-level handheld will launch on October 12 alongside Pokemon X and Y for $130.

The 3DS currently retails for $170.The Nintendo 2DS will play all Nintendo 3DS games and is backwards compatible with Nintendo DS titles. It will be available in two versions: black with blue trim and black with red trim.The form factor of the Nintendo 2DS is completely different than the 3DS. The new model is not hinged. And though it features two screens (of identical size to the 3DS), it bears a more tablet, slate style.The Nintendo 2DS features two cameras with which users can snap photos or record video. Users can't play back this content in 3D on their systems, but can insert their SD card into a 3DS to view their content in 3D.Just because Nintendo is releasing a non-3D handheld, it does not mean the company is distancing itself from 3D altogether, as the 3DS will remain on sale. Instead, the 2DS is aimed at attracting more consumers overall through its lower price point, according to Nintendo marketing executive Scott Moffitt."It doesn't mean that we are not committed at all to 3D and that we don't think that's a really valuable, unique eye-popping feature for a lot of gamers," Moffitt told GameSpot. "We just wanted to continue growing the installed base and needed to find a way to get to a price point that was more accessible for a broad swath of consumers.""As we surveyed the marketplace, it seemed to us that there was an opportunity for something at that lower, entry level price point," he added.Nintendo will also release a carrying sleeve for the 2DS.

0 comments:

GTA V soundtrack to feature 240 licensed songs,15 radio stations

Posted by Yo  
Tagged as:
21:41


Grand Theft Auto V soundtrack will include 240 tracks; artists include Camilo Lara, DJ Pooh, Kenny Loggins, and Tangerine Dream.

Rockstar has revealed details for Grand Theft Auto V's eclectic in-game soundtrack.Unveiled through Rolling Stone (featuring audio samplers), the game will reportedly feature 240 licensed songs, a total of 15 music radio stations, two dedicated talk radio channels, and "somewhere in the proximity of 20 movies' worth of score". Collaborating artists and presenters include Camilo Lara, DJ Pooh, Jesco White, Pam Grier, Bootsy Collins, Kenny Loggins, Flying Lotus, Alchemist, and Oh No.
"For this game, which is set in our version of modern-day Los Angeles, what was important for us was to capture that feeling of LA and California," Rockstar soundtrack supervisor Ivan Pavlovich told the publication. "We approached the radio stations as the musical soundscape [you experience] as you fly into LA. One of the things we've never done in a GTA game before is a pop station; exploring that made so much sense in the context of LA."
Grand Theft Auto V also marks the first game in the series to introduce its own original score. Created with German electronic group Tangerine Dream in conjunction with Red Dead Redemption score creator and L.A. Noire soundtrack artist Woody Jackson, game audio will differ based on player actions.
"The score plays during missions and the open-world gameplay, and during online play," Pavlovich said. "It's completely dynamic, and engineered very similar to what we've done in the past with our interactive stem system--it responds to what you're doing with your character."
Grand Theft Auto V launches worldwide on the Xbox 360 and PlayStation 3 on September 17. Rockstar has promised an "official trailer" for the game on Thursday, August 29.

0 comments:

Wednesday 28 August 2013

Saints Row IV PC game (2013)

Posted by Yo  
Tagged as:
23:39

                      Saints Row IV - www.blackboxrepack.com

"Saints Row 4 takes the award-winning, over-the-top action of Saints Row: The Third and adds the most requested gameplay features from the Saints Row community: freaking super powers.
“Faster than a speeding cyber jetbike, more powerful than a roided-out Luchadore, able to leap flying aircraft carriers in a single bound… That’s the power you’ll find inside the Dominatrix. Use it for good. Use it for evil. Use it for whatever you want. As always in Saints Row, it’s up to you,” said Danny Bilson, Executive Vice President, Core Game Production, THQ Inc. “With a franchise with more than 11 million units shipped globally, it’s incredibly gratifying to have the flexibility to give Saints Row fans the features they want most.”

Requirements:Core 2 Duo 2.5 GHz, 4 GB RAM, graphic card 1 GB (GeForce GTX 260 or better), 10 GB HDD, Windows Vista(SP2)/7/8.

Saints Row IV Saints Row IV Saints Row IV Saints Row IV

0 comments:

Saturday 24 August 2013

How To Unlock an Android Pattern

Posted by Yo  
Tagged as:
17:05


Android is most used OS in the cell phone today’s everybody use android phones now days. this is a android is LINUX based operating system provide by Google. android phones is very easy to access there is lot of companies who sell android phones. Biggest seller of android is Samsung and HTC and many other who made android based phones. today every one wants higher configuration phones so there is lot of phones today i like s3 and Samsung note these phones are very fast and good to use but little expensive for everyone. in today there is lot of apps for android available for Google play store you can download free of coast of buy some apps very easily . How To Unlock an Android Pattern droid phones is easy to accessible and you can play every thing in this phones there is LAKH’S of app for android is available in the play store there is many inbuilt apps available for most android p hones .there is many ways to give security to yous phones with some apps you can use inbuilt unlock pattern or unlock codes for easy security you can also download some unlock codes app from play store easily.Here is some android Android Secrete Codes for secrete use. there is lot of games available for phones the most used app is TEMPLE RUN 2 and many other these are free of coast apps available for everyone in the play store app in the droid phones. now look How To Unlock an Android Pattern .
How To Unlock an Android Pattern:

Today many android phone user use the inbuilt unlock pattern for give security to there phones this is very easy to use but some time to take many wrong attempts it locked permanently after that you need to enter the user id you enter in the google play store to unlock phone but there is some problems to unlock again if u stop data usage in your so it can’t be connected with internet and then you cannot unlock phone without this trick. sometime user needs to go to Samsung care center and then give some money to unlock it again so this is costly you need to pay here i gona give you a trick How To Unlock an Android Pattern Just follow these simple steps to unlock your phone and use again free of coast.
1:phone want you to enter the user email id you enter in the play store.
2:you don’t know the email id.
3:Then just don’t worry just follow these steps.
4:just switch off you android phone and then wait for second to switched of it.

5:then first click Up Volume Key and hold it.
6:then click on home button and hold it.
7:then press the power button and after is started just release it.
and then you can see you enter in the secret android menu you never see it before.
8:just click on home button for up and down in the menu.
then just go to third option named as DELETE ALL USER DATA.
then it takes dome time.
the phone will be started and the unlock patter problem is fixed.
but the main prob is to do this it reset the phone . but it is the one and only trick to get regain access to you phone.
this is all How To Unlock an Android Pattern COMMENT down if any problem and also LIKE the post subscribe to our rss news letter for more tricks in you inbox.

0 comments:

Wednesday 21 August 2013

Battlefield 4 charges forth with multiplayer trailer, beta in October

Posted by Yo  
Tagged as:
14:30


We're on the precipice of a huge war -- well, at least in the virtual world. The highly anticipated Battlefield 4 was a hot topic Tuesday at the Gamescom expo in Cologne, Germany, as developer DICE detailed a closed (and open) beta, a new multiplayer trailer, and information about the Premium service, as well as the names of the expansions.
An explosive Battlefield 4 multiplayer trailer shows gamers a hectic, watery landscape called "Paracel Storm" that will test the skills of any rabid first-person shooter fan. The explosive trailer reveals how chaotic 64-player (32 vs. 32 on all platforms) online combat can play out, especially in this montage that showcases nonstop explosions, collapsing buildings, and fierce air- and naval-based warfare.


Obliteration, a new game mode seen in the trailer, intensifies combat by placing only one bomb on the map that either team must use to destroy the enemy's objective. It'll be a race to get the bomb before the enemy does, and it will surely lead to some intense confrontations.
Starting in early October, PC, Xbox 360, and PlayStation 3 gamers with either a Battlefield 3 premium account, a Battlefield 4 Digital Deluxe Edition pre-order, or a copy of a limited edition Medal of Honor Warfighter get access to an exclusive three-day Battlefield 4 beta. After that period, the beta opens up to all gamers so everyone can get a feel for next-generation battle before the game hits the masses.
DICE provided information about Battlefield 4's $50 Premium service, which largely mirrors the same system that more than 4 million Battlefield 3 players bought into. Similar to its predecessor, Premium includes full copies and two-week early access to upcoming expansions, exclusive equipment packs, priority server queuing, and more. A Battlefield 4 Premium membership can transfer between current- and next-generation gaming devices.
Lastly, there's some information regarding the five upcoming expansions for Battlefield 4: Second Assault includes four classic maps redesigned with Frostbite 3 tech; China Rising, a pack of maps and modes based in the Chinese mainland, comes in December; Naval Strike, an ocean combat theme, sails in the spring of 2014; Dragon's Teeth offers urban warfare sometime next summer; and Final Stand concludes the series next summer.
Battlefield 4 debuts for PC, Xbox 360, and PlayStation 3 on October 29, while the Xbox One and PlayStation 4 versions arrive when those consoles launch.

0 comments:

How To Shutdown Someones Computer By Using CMD

Posted by Yo  
Tagged as:
13:13


Just See This Video Tutorial:

0 comments:

Monday 19 August 2013

GTA V Game Play + Full Download PC) I Leaked GTA 5 Press Release Version I 1 Click Installer

Posted by Yo  
Tagged as:
20:42


Download Link For The Leaked GTA V Press Release Version:
Click Here To Download

Mirror should MEGA not work:
Click Here To Download


Virus Scan:
Click Here To Download
This Installer connects to the online resources of GTA V on the Rockstar Games Server, used to distribute GTA V to various Games Magazines and Sites, so they can review and test GTA V. A 1-Click Installer is way safer and easier to distribute than a physical copy of the game, but unfortunately for Rockstar Games it still made its way to the internet before the official release date of GTA V.

How To:
1.) Download the 1-Click Installer
2.) Create a Folder called "Grand Theft Auto V" wherever you want
3.) Run the 1-Click Installer
4.) Wait until all files have been successfully written onto your PC from the Rockstar-Games server
5.) Play GTA V

0 comments:

How to Update Galaxy Y GT-S5360 to Android 4.1.2 Jelly Bean Custom Firmware

Posted by Yo  
18:32


for Samsung Galaxy Y S5360 Clear anti scratch high transparent Screen Protector 1024x1024 How to Update Galaxy Y GT S5360 to Android 4.1.2 Jelly Bean Custom Firmware
Now you can update your Samsung Galaxy Y GT-S5360 to Android 4.1.2 Jellybean Custom ROM by following the instructions given below. By rooting your Samsung Galaxy Y GT-S5360 you have the ability to load custom ROM firmwares and this guide also covers how to root Galaxy Y GT-S5360.
Note that this update is not an official update by Samsung but is custom ROM based on Android 4.2 Jellybean.

Proceed at your own risk

Please apply the information given in this blog(Technoblog) at your own risk and responsibilities and any damages caused by following our tutorials or Guides will not be acknowledged by us.

Basic Prerequisites before rooting:

As rooting process involves loss of data it is advised to backup all your valuable data which might well cost you a lot on their loss. In case you loose your data or get your data corrupted you can always have yourbackup to restore it back. It is also good if you don’t use KIES software or any other ROM managers tobackup your data.
Things you need to back up: SMS, Contacts, Call log, Images, songs, videos, files which are present in your internal memory, APN and MMS settings (follow this path “Applications > Settings > Wireless and Network > Mobile Networks > Access Point Names”) From the path “Settings > Applications > Development > USB debugging”, enable the USB Debugging, ensure that the USB debugging option is ticked (Check marked). Also be sure that your battery is not below 35% if not you could get your device turned off in the middle of the firmware update.
You must have rooted your device and installed ClockworkMod Recovery on your device.
You also need to make sure that the antivirus app is turned off as it could interrupt the firmware update process. USB read/write option should be there in your computer.

Guide for rooting Samsung Galaxy Y GT-S5360:

Step 1: Download the Rooting package to your computer. After you have downloaded the package you need to connect your phone to the computer with the help of original USB cable (please avoid using duplicate cables) and place the downloaded Rooting Package in your phone’s external SD Card.
Step 2: Disconnect the device from your computer and turn it off so that it can be entered in recovery mode.
Step 3: The recovery mode can be entered by holding Volume UP Key + OK button simultaneously and press the power button for few seconds till the device starts. Now in this recovery mode select “Wipe data/factory reset” & “Wipe Cache partition” so that all the cache data will be cleared.
Step 4: Now select install zip from SD card and then select the rooting package which you have placed in your device earlier and press the power button to confirm the same. Once the file is selected you will need to follow the on screen instructions for rooting the device. This whole process usually takes around 4 to 5 minutes or also takes longer time in some cases.
Step 5: Now your device is rooted and to check whether your device is rooted or not you need to install Root Checker app from Google Play Store. If the device isn’t rooted then follow from step one.

Disclaimer

All the custom ROMs and firmwares, official software updates, tools, mods or anything mentioned in the tutorial belong to their respective owners/developers. We (hackerplant.blogspot.in) or the developers are not to be held responsible if you damage or brick your device. So follow the tutorials at your own risk.

Guide to Install Android 4.1.2 Jelly Bean Taste ROM on Samsung Galaxy Y S5360:

Step 1: Download Taste ROM Android 4.1 ROM to your computer.
Step 2: Connect your phone to your computer using the original USB cable at the time of purchase and mount phone’s storage or SD card on computer.
Step 3: Copy the downloaded ROM file to root folder on phone’s SD card.
Step 4: Disconnect your Phone from the computer by removing the USB cable and switch off your device.
Step 5: Enable recovery mode in your device by pressing and holding Volume Up, Home and Power buttons. Wait until screen flashes and then release all three buttons.
Step 6: Using CWM Recovery take Nandroid backup of current ROM, so that it can be restored if new ROM fails to work or you want to return to original ROM. To do a backup, choose Backup and Restore and then click Backup on next screen. Return to the main recovery menu once backup is completed.
Step 7: Next you need to perform a full data wipe task: choose Wipe Data/Factory Reset and then click Yes on next screen to confirm. Wait for a few minutes until data wipe process completes. Return to CWM recovery main menu and click Wipe Cache Partition. Wait until wiping process completes and then choose Wipe Dalvik Cache under Advance options.
Step 8: Return to main recovery screen and select Install zip from SD card and then click Choose zip from SD card. Browse to JellyBean 4.1.2 ROM zip file that you copied to phone in Step 3 and select it by tapping Power. Confirm ROM installation by choosing Yes on next screen and installation will begin.
Step 0: Once done, return to main recovery menu and tap reboot system now to reboot into newly installed JellyBean 4.1.2 ROM. Please wait for 10 to 15 minutes as the first boot may take some time.
The Galaxy Y GT-S5360 is now successfully updated to Android 4.1.2 based on Taste ROM . Go to Settings > About Phone to verify firmware version installed.

0 comments:

Sunday 18 August 2013

How to Root Micromax A110 Canvas 2 running on official Jelly Bean OS (Guide)

Posted by Yo  
14:51


Micromax A110 How to Root Micromax A110 Canvas 2 running on official Jelly Bean OS (Guide)

Basic Prerequisites before rooting:

As rooting process involves loss of data it is advised to backup all your valuable data which might be restored after wards when you need it. In case you loose your data or get your data corrupted you can always have your backup to restore it back.
Caution: Rooting will void the warranty of your product. So do at your own risk.
Things you need to back up: Create a backup of all the data like call log, messages (How to Backup SMS and Restore it on any Android Device), applications , music, videos and other data which is present in the phone, so that you can restore the same once the rooting process is completed.
Enable USB debugging mode (Menu (app drawer) > Settings > Developer Option/Development > USB Debugging – check box) [Guide to Enable USB Debugging mode on various Android Versions]
Also be sure that your battery is not below 85% if not you could get your device turned off in the middle of the firmware update.
See that all your security suites like antivirus and firewalls are disabled on your computer.
Make sure you have installed Micromax A110 Canvas 2 USB drivers provided along with the device at purchase. (Micromax A110 Canvas 2 Original USB drivers)

Disclaimer

All the custom ROMs and firmwares, official software updates, tools, mods or anything mentioned in the tutorial belong to their respective owners/developers. We (Mobiada.com) or the developers are not to be held responsible if you damage or brick your device. So follow the tutorials at your own risk.

Step by Step Guide to root Micromax A110 Canvas 2 running Stock OS:

Step 1: Download the Bin4ry Rooting Toolkit and extract it in your computer.
Step 2: Connect your Micromax A110 Canvas 2 to your computer with the help of the original USB cable provided in the sales package at the time of purchase. Wait for some time for the drivers to install. Usually drivers will be installed automatically, if you face any problems in the installation then use Pdanet to install your drivers manually.
Step 3: Once your computer detects your phone, change the mode of your Canvas 2 device from USBstorage to Media Device.
Step 4: Open the files in the folder which you have downloaded and extracted in the step 1.
Step 5: Choose RunMe and click on the file. A CMD screen appears with some options.
RunMe Downloaded Files How to Root Micromax A110 Canvas 2 running on official Jelly Bean OS (Guide)
Step 6: In the window you will be asked to choose one option among Normal and Special. You need to choose Normal Mode by pressing 1 and then hit Enter.
RunMe Micromax Canvas 2 root How to Root Micromax A110 Canvas 2 running on official Jelly Bean OS (Guide)
Step 7: Now follow all the instructions carefully to complete the rooting process. Your phone will reboot during this process in order to copy some files, so dont panic but just be patient for the entire process to carry out completely. You need to wait till the green letters in Command prompt say have Fun!. Once your phone is turned ON, you will find “superuser SU” app among your apps in the apps drawer.
FnMvb How to Root Micromax A110 Canvas 2 running on official Jelly Bean OS (Guide)
Where you expecting anything more, now just check if your Micromax A110 Canvas 2 phone is rooted or not with root checker app.
Note : If you are unable to find SuperUser in your apps drawer install it from Google Play Store.

How to flash the CWM Recovery:

  • Download the CWM recovery file from here.
  • Rename the file to recovery.img and Transfer the renamed file to your phone SD card.
  • Download MobileUncle MTK tools from Google Play on your Micromax A110 and install it.
  • Open the MTK tools app.
  • Select update recovery option, now choose the recovery.img that you have just transferred to your Micromax A110.
  • The app will flash CWM recovery on your A110 now.

Step by Step Guide to root Micromax A110 Canvas 2 running on Jelly Bean OS:

Step 1: Download Latest CWM Recovery for Micromax A110 Canvas 2 and rename the downloaded file to recovery.img. Also download MT6577_Android_scatter_emmc.txt from here.
Step 2: Next download the Flash_Tools.rar and extract it in your computer.
Step 3: Open Flash Tools from the downloaded file and run Flash_tool.exe.
Step 4: Click Scatter-loading and select the downloaded file MT6577_Android_scatter_emmc.txt.
Check recovery option and uncheck all other options.
Step 5: Click on Recovery and select the cwm recovery image called the recovery.img. Make sure to switch off your phone and connect it to your pc.
Step 6: Remove your phone from your computer. Click the Download button provided in the Flash tool.
Step 7: Reconnect your phone to the computer. Ensure the drivers for your phone are installed on your computer. If it is done correctly, a green ring appears on the screen indicating the progress.
Now your Micromax A110 Canvas 2 running on Jellybean OS is successfully flashed. Check your device withroot checker if it is rooted or not.

Guide to show how to install Superuser manually:

1. Download Super user binaries. Move it to the root of your sdcard.
2. Switch off your handset.
3. Press Power + Volume Up + Volume Down buttons to boot your device in CWM mode.
4. Press Volume Up button to continue to Clockworkmod Recovery. Use your volume keys to navigate the options and power button to make selections.
5. Select Install zip from SD card. After finishing, Reboot your Micromax A110 Canvas 2 normally.

How to UnRoot Micromax A110 Canvas2 to Stock Rom:

Step 1: The Procedure to unroot Micromax A110 Canvas2 is same as rooting till your reach CMD with green letters which are explained in the first tutorial. You need to follow the same procedure.
Step 2: Instead of typing “1″, type “x” and hit enter. Follow the instructions that appear on the command prompt after that and your Micromax phone will be back to stock state with warranty..

0 comments:

Samsung Galaxy S5 might have carbon body

Posted by Yo  
14:41

                                 
Rest asured that Samsung is keeping a close eye on the HTC ONE sales figures.
Over the last couple of years Samsung has been given their fair share of praise for their Galaxy s series of phones. The only thing that people has not been very satisfied with since the Galaxy s2 is that the devices don’t feel premium enough.
When we spend a lot of money on a new phone we don’t only want it to be a great phone we also want it to look and feel like a premium phone.
This could very well be the reason behind the success of Samsungs biggest competition in the Android segment of smart phones. When HTC made the ONE they made a phone that not only was a state of the art cell phone. They also made sure that it looks and feels like a million bucks. Thanks to the aluminium body of their latest creation it has become the their best selling phone in a long time.

In a press release from SGL GROUP, a maker of carbon fibre we can read that they have established a joint venture with Samsung to start utilizing carbon in new ways.
We can only assume that this means that we will soon start seeing some new and exciting uses for carbon fibre in electric appliances. As soon as I read this thing the first thing that popped into my mind was that the Samsung Galaxy s5 would be made from Carbon fibre. There is no way of telling at his point if this will turn out to be true, but I sure hope  my intuition was right on this one.

Carbon fibre would be the perfect material for a premium looking cell phone. Not only is it extremely light weight but also it looks really cool. I could certainly imagine upgrading from the Galaxy s4 to the Galaxy s5 simply because it sports a Carbon fibre body.
Certainly Samsung would not release a phone of this magnitude in just the one color but it would be great if the next Galaxy s series phone would be available in carbon fibre.

0 comments:

Saturday 17 August 2013

How To Root Sony Xperia Z

Posted by Yo  
19:09


How To Root Sony Xperia Z

Sony Xperia is one the best phones by Sony.It is driven by 1.5 Ghz Qualcomm Snapdragon S4 processor with 2GB RAM.It has a 5 Inch TFT Capacitive Touchscreen.You Will Love It’s Touch Gesture and Bravia Engine 2.It Comes with Android OS v4.1,but to upgrade it further Rooting is Required and it’s the point where the question arises how to root Sony Xperia Z.
It is one of the rarest phones whose rooting method came just after short time of launch.Rooting have many Cons and Pros and you all are well aware of them.Rooting gives you access to whole new world of apps and removes manufacturer limitations.Most of the android phones get easily rooted and some of the best are Samsung android phones,Htc Phones and Sony Phones.So We have come with the method to root Sony Xperia Z.Now You Don’t Need to Search More On How To Root Sony Xperia Z.

Specifications:-

  • Android V4.1 OS
  • 13 MP primary Camera
  • 2 MP secondary Camera
  • 5 Inch touchscreen
  • 1.5GHz Qualcomm Processor
  • Water and dust resistant

Before you Begin:-

  1. Unlock Your Bootloader From Here.
  2. Charge Your Battery To At least 70%.
  3. Keep In Mind The Risks While Rooting Android Phone.
  4. Backup Your Contacts and Apps.
  5. Firmware Version of Sony is 10.1.A.1.350.

Download Required Files To Root Xperia Z:-

  1. Cf Auto Root
  2. Fastboot

How To Root Sony Xperia Z Via Doomlord:-

  1. Plugin usb cable to your Pc Not to Sony Xperia Z.
  2. Now Turn off The Sony Xperia Z.
  3. Reboot into Fastboot mode. (Hold Down The Volume up Button and connect Usb To Xperia)
  4. Now open the command prompt windows on fastboot.
  5. Enter The Following code to flash Doomlord Modded CF auto Root.>fastboot flash boot kernel.img
  6. Now Write “fastboot reboot” to Reboot The Device.
  7. Now Your Android Phone will restart.
  8. Now After Restart Disconnect Your Device.
  9. Now Close Your Phone and let it vibrate for 3 times and then Boot into Fastboot mode again.
  10. Now Connect Your Xperia Z With The Pc.
  11. Type The Command Below To Flash The Stock Kernel Image.
    > fastboot flash boot stock-kernel.img
  12. Enter Fastboot Reboot again and after that it will work normally.
  13. Once the Device Boots up Download Busybox Application from Google Play Store.
Now You have Rooted your Sony Xperia Z and now have complete root access.So it was neither easy nor to hard to root Sony Xperia Z and as said must install some among the best antivirus for android.Your Suggestions and Questions on the Process How To Root Sony Xperia Z is heartly welcome and keep reading our guides on rooting and how to articles.
Note:Try It on Your Own Risk.It is For Tutorial Purpose only and Zapworld will not be the responsible to what happens to your phone.

0 comments:

Online Visitors

Copyright © 2013 Technoblog. Blogger Template by BloggerTheme9
Proudly Powered by Blogger.
back to top